

PvP Tanking for Dummies by Hottie (5.9)
Revisions
| Date | Notes |
|---|---|
| 2018-12-06 | Minor edits to reflect that critical hits can be shielded against in PvP as of game update 5.9.3. Layout/visual improvements throughout. |
| 2018-05-14 | Updated to reflect changes to Immortal, Darkness and Shield Tech (and their respective Republic mirror) disciplines as of game update 5.9. |
Glossary
| Term | Definition |
|---|---|
| AoE | area of effect |
| CC | crowd control (e.g., stun) |
| hard stun | a type of CC that doesn't break on damage taken (e.g., Electrocute) |
| mez | a type of CC that breaks on damage taken (e.g., Awe) |
| sap | a type of mez that is only usable from stealth on targets out of combat (e.g., Mind Maze) |
| DPS | damage per second |
| GCD | global cooldown: when activated, most of your abilities trigger a global (or universal) cooldown of 1.5 seconds, during which time no other abilities can be used; some abilities do not respect the global cooldown (referred to as being “off the GCD”); Alacrity reduces the GCD |
| LoS | line of sight |
| proc | when conditions are met to trigger a passive ability (e.g., generate a stack of Dark Ward) |
Introduction
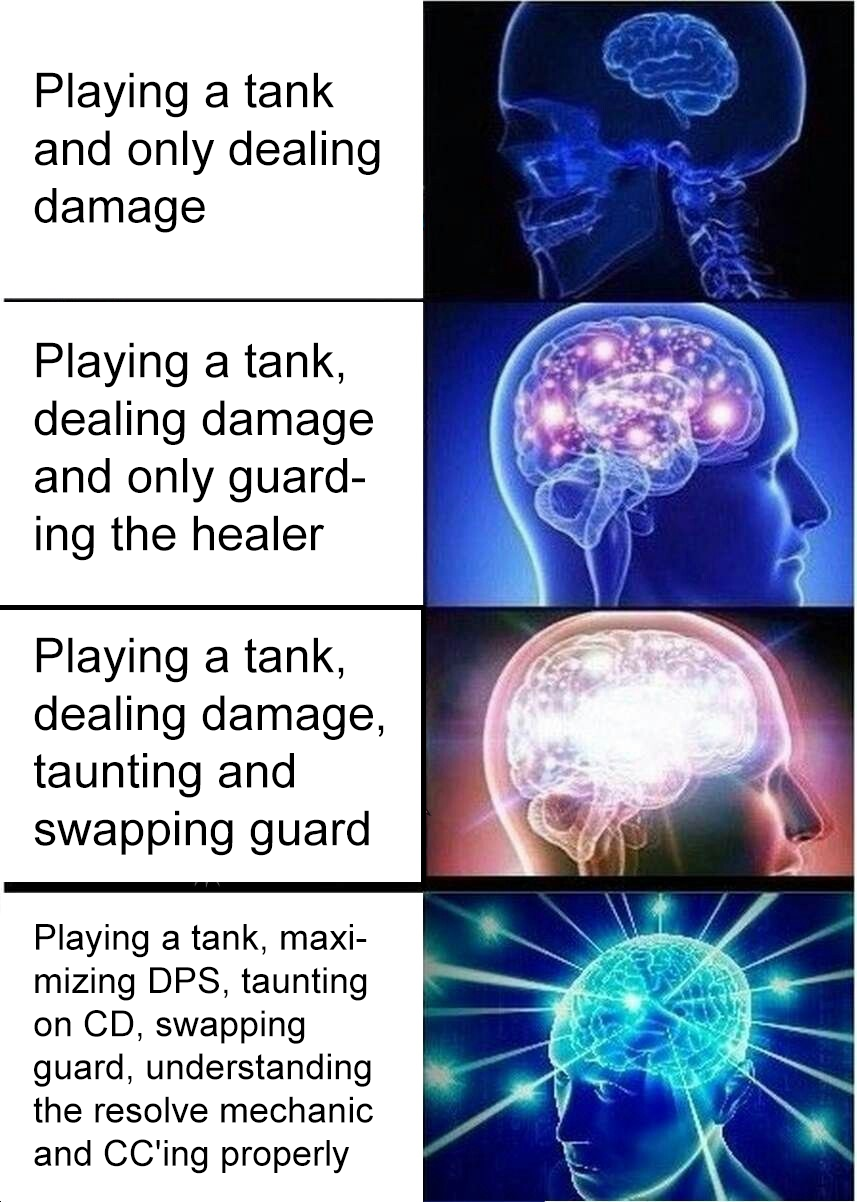
A tank is a support-DPS hybrid whose main job is to reduce the enemy team’s outgoing damage by using taunts, mitigating burst damage with timely Guard swaps and helping to peel and/or control enemy healers and DPS.
Tanks’ secondary objective is to contribute DPS to help secure kills. Good tanks need to recognize and understand other classes’ abilities to effectively mitigate incoming damage. They also need the situational awareness to know which allies to Guard and when. PvP tanking has a high skill ceiling. The challenge lies in maximizing damage output while reducing incoming damage from the enemy team as much as possible.
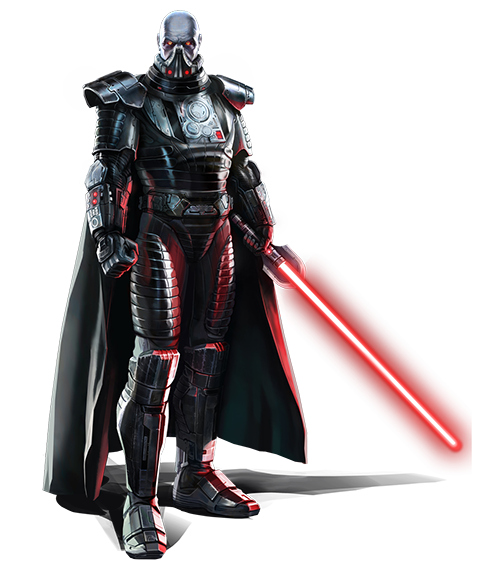
Three classes (per faction) have tank disciplines.
| Imperial | Republic |
|---|---|
| Immortal Juggernaut | Defense Guardian |
| Shield Tech Powertech | Shield Specialist Vanguard |
| Darkness Assassin | Kinetic Combat Shadow |
Stats
| Stat Rating | Description |
|---|---|
| Accuracy Rating | Tank disciplines gain 10% Accuracy. Additional Accuracy Rating is not necessary. |
| Defense Rating | Increases chance to defend against melee- and ranged-type (i.e., “white damage”) attacks. |
| Shield Rating/Absorb Rating | All melee- and ranged-type attacks and Force- and tech-type attacks which cause kinetic or energy damage can be shielded against. Attacks that cause internal or elemental damage cannot be shielded against. |
| Critical Rating | Increases Critical Chance and Critical Multiplier. |
| Alacrity Rating | Decreases GCD, channel and cast times, internal CDs and increases resource regeneration rate. |
| Power | Increases Bonus Damage. |
| Mastery | Increases Bonus Damage and Critical Chance. Slightly better than Power for DPS. |
| Endurance | Increases maximum HP. |
A strong offense is a good defense. The current PvP “meta” is for tanks to gear for maximum DPS as opposed to mitigation (stacking Critical Rating, etc., instead of Shield Rating, etc.) and to equip DPS relics.
For an in-depth look at stats and damage calculation in SWTOR, see our recent guide.
Set Bonuses
| War Leader (Juggernaut/Guardian) | |
|---|---|
| 2-piece | Crushing Blow or Guardian Slash increases damage reduction by 2% for 4 seconds. |
| 4-piece | Force Scream or Blade Storm reduces the cooldown of Taunt and Challenging Call or Threatening Scream by 2 seconds per activation. | 6-piece | Increases the duration of Blade Turning by 3 seconds, and the duration of Invincible or Warding Call by 5 seconds. |
| Survivor (Assassin/Shadow) | |
| 2-piece | Wither or Slow Time increases damage reduction by 2% for 3 seconds. |
| 4-piece | Wither or Slow Time reduces the cooldown of Mind Control and Mass Mind Control by 2 seconds per activation. | 6-piece |
| Supercommando (Powertech/Vanguard) | |
| 2-piece | Heat Blast or Energy Blast increases damage reduction by 2% for 5 seconds. |
| 4-piece | While Ion Gas Cylinder or Ion Cell is active, Rocket Punch or Stockstrike reduce the cooldowns of Neural Dart and Sonic Missile or Neural Jolt and Sonic Round by 2 seconds. | 6-piece | Increases the duration of Oil Slick or Riot Gas by 3 seconds and the duration of Energy Shield or Reactive Shield by 4 seconds. |
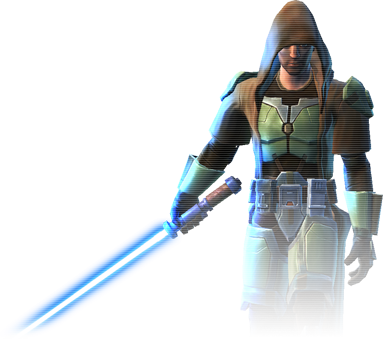
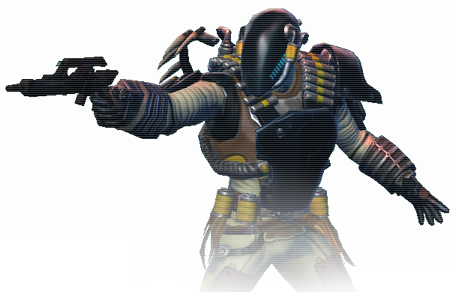
Shield Offhand
Fig. 1: Shield offhand.
Always make sure you have a shield equipped in your offhand slot. This will markedly increase your survivability at a small cost to your damage output. You cannot shield against incoming attacks with a focus or generator (DPS offhands) equipped—only with a shield.
Tanks also have useful abilities that are triggered by shielding against attacks, as follows.
Juggernaut/Guardian
Parrying, deflecting, shielding against or resisting an attack has a 50% chance to grant Revenge (Courage), reducing the rage/focus consumed by your next Force Scream (Blade Storm) or Vicious Throw (Dispatch) by 1.
Powertech/Vanguard
Heat Screen (Power Screen) stacks are generated by shielding against attacks or triggering Ion Gas Cylinder (Ion Cell).
Assassin/Shadow
Whenever you shield against, parry or deflect an attack, you recover 2% of your maximum Force, your next (Force Breach) does 75% more damage and the active cooldown of Force Shroud (Resilience) is decreased by 1 second. Additionally, shielding against an attack with Dark Ward (Kinetic Ward) active restores a charge and increases its active duration by 1 second.
Powertech and Vanguard shields carry an intrinsic amount of Tech Power while Assassin, Shadow, Juggernaut and Guardian shields carry Force Power.
Tanking Mechanics
Guard
 Guard
Guard While active, the guarded player takes 5% less damage and generates 25% less threat. In addition, so long as you remain within 15 meters of the guarded player, 50% of all incoming damage from enemy players is transferred back to you.
Guard is the most powerful ability in the tank’s kit. Guarded teammates are undesirable targets for enemy DPS.
| Advanced Class | Guard Icon |
|---|---|
| Juggernaut |

|
| Guardian |

|
| Powertech |

|
| Vanguard |
|
| Assassin |

|
| Shadow |

|
Fig. 2: Demonstrating Guard’s effective range (15m).

Fig. 3: Active and inactive Guard.
Taunting
Taunting is extremely important for tanks (as well as for DPS who have this ability). When a character is taunted, their attacks against anyone other than the caster temporarily deal 30% less damage.
Taunts are normally on short cooldowns: use them often. Every advanced class with a tanking discipline (Powertechs, Juggernauts, Assassins and their Republic counterparts) has one single-target taunt and one AoE taunt.
| Advanced Class | Single-target Taunt | AoE Taunt |
|---|---|---|
| Juggernaut | Taunt | Threatening Scream |
| Guardian | Taunt | Challenging Call |
| Powertech | Neural Dart | Sonic Missile |
| Vanguard | Neural Jolt | Sonic Round |
| Assassin | Mind Control | Mass Mind Control |
| Shadow | Mind Control | Mass Mind Control |
Protection

Fig. 4: Post-match statistics.
In the post-match statistics, all the damage you prevented with taunts and redirected via Guard counts towards your Protection score. The better you are at taunting the right targets on cooldown and rotating your Guard to mitigate as much damage as possible, the higher this number will be.
Hard Stuns and Mezzes
Every discipline in SWTOR has at least one hard stun and one mez (except Powertechs/Vanguards, who have an AoE hard stun instead of a mez).
Learn the difference between hard stuns, which are stuns lasting 2–4 seconds that do not break on damage, and mezzes, stuns lasting 6–8 seconds which do break on damage. When you are mezzing a player in hopes of stopping them from casting or helping a teammate escape, try not to break your own mez! Also note that teammates can break your mezzes. For example, if the target you want to CC has DoTs on them, any mez will be broken as soon as the DoT ticks. In this instance, it's better to hard stun the target.
Be aware that hard stuns and mezzes build resolve. You cannot CC targets indefinitely: chaining CCs on a target fills their resolve bar, turning it white and granting them temporary immunity to mezzes and hard stuns. Learning the basics of the resolve system will help you improve as a support player. I would advise studying the Resolve chapter of Ne’laa’s excellent guide to PvP.
| Discipline | Stun | Mez |
|---|---|---|
| Immortal Juggernaut | Backhand | Intimidating Roar |
| Force Choke | ||
| Defense Guardian | Hilt Bash | Awe |
| Force Stasis | ||
| Shield Tech Powertech | Electro Dart | |
| Carbonize | ||
| Shield Specialist Vanguard | Cryo Grenade | |
| Neural Surge | ||
| Darkness Assassin | Electrocute | Whirlwind |
| Spike | Mind Trap | |
| Kinetic Combat Shadow | Force Stun | Force Lift |
| Spinning Kick | Mind Maze |

Disciplines
Immortal Juggernaut
Offensive Abilities
The priority system is as follows:
- Retaliation (off the GCD),
- Crushing Blow,
- Ravage (if target is in execute range, Vicious Throw is also here),
- Force Scream then
- Smash.
| Ability | Notes |
|---|---|
| Vicious Slash | Single-target filler; also applies Trauma, reducing targets’ healing received by 20%. |
| Sweeping Slash | AoE filler; also applies Trauma, reducing targets’ healing received by 20%. |
| Aegis Assault | Generates 6 rage and increases damage reduction by 3% for 20 seconds; when active, Crushing Blow hits up to 7 additional targets. |
| Saber Throw | Deals single-target damage at range and builds 3 rage. |
| Chilling Scream | Spammable AoE slow; the Piercing Chill utility causes Chilling Scream to deal periodic elemental damage to targets and increases caster’s movement speed for 8 seconds. |
| Assault | Use when out of rage. |
| Revenge | Passive skill. Parrying, deflecting, shielding against or resisting an attack has a 50% chance to grant Revenge, reducing the rage consumed by your next Force Scream or Vicious Throw by 1. |
Defensive/Peeling Tools
| Ability | Notes |
|---|---|
| Intercede | A friendly leap exclusive to Juggernauts. The player who is leapt to benefits from 20% damage reduction for 6 seconds. This is powerful, especially in conjunction with taunts and/or Guard. |
| Force Push | Can be used offensively (to interrupt and isolate targets) and defensively (to help peel). |
Fig. 5: Juggernaut’s Intercede animation.
Defensive Cooldowns
| Ability | Notes |
|---|---|
| Saber Reflect | Saber Reflect is one of your go-to cooldowns when under heavy focus fire or being “tank tunneled”. It should only be used in this situation as it does nothing to mitigate collateral AoE damage or damage taken through Guard. You need to learn which attacks can be reflected and notice when you are the main target of these attacks. |
| Enraged Defense | While it can be used at <70% health, never use it at more than 50% health or you risk wasting it by overhealing yourself. You should be particularly conservative with this DCD when you have a healer on your team. Unless you’re in voice chat with your healer to ask them, you can’t know for sure whether you need to use Enraged Defense or to expect some burst healing. If you are in communication with your healer, let them know before you use it so they can focus on healing others and avoid overhealing you. Note that this ability can be used while stunned. |
| Invincible | Reduces damage taken from all sources by 40% for 10 seconds (or 15 seconds with the War Leader 6-piece set bonus). That includes collateral AoE damage and damage taken through Guard. Note that the damage reduction is multiplicative, not additive. Use it to stay ahead during periods of heavy incoming damage. |
| Saber Ward | Ideally used when tank tunneled because it grants 100% dodge chance for its first 5 seconds with Blade Turning and the War Leader 6-piece set bonus and 50% increased dodge chance for the remainder. This is useless against a lot of the AoE you’re likely to catch. However, unlike Deflection (Deflection), this ability also offers +25% damage reduction against Force and tech attacks. It can therefore be effective (to a varying degree) at mitigating damage taken through Guard but is still much less effective than at mitigating direct damage. If your opponents show no interest in tank tunneling you then you need to be prepared to use it just for the yellow damage reduction. Note that, because you can’t dodge attacks while hard stunned, this cooldown is especially effective when you have full resolve (are “white-barred”). |
| Endure Pain | This is an odd DCD. For the Immortal discipline, it temporarily increases maximum health by 30% for 20 seconds. However, the extra (or “fake”) health is lost when Endure Pain expires. When out of options, it buys time for teammates to heal you or for other DCDs to come off cooldown. |
| Mad Dash | Grants a brief window of immunity to everything (damage and CCs). Use it to kite, establish range, reposition or to resist abilities like Heatseeker Missiles (Demolition Round) or Thermal Detonator (Assault Plastique). |
Recommended Utilities
| Key | |
|---|---|
| must have | |
| recommended | |
| not recommended | |
The following table ranks utilities by usefulness (see key). A recommended build for typical warzones is given afterwards. When you feel comfortable with the discipline, I encourage you to experiment, to find which utilities complement your playstyle and which are best suited to particular situations, team compositions, etc.
| Utility | Description | Appraisal |
|---|---|---|
| Payback | Reduces the cooldown of Unleash by 30 seconds and causes Unleash to heal you for 10% of your maximum health when used. | |
| Warmonger | Getting attacked reduces the active cooldown of Force Charge by 1 second. This effect cannot occur more than once every 1.5 seconds. | |
| Overwhelm | Ravage immobilizes the target for 3 seconds. | |
| Path Carver | Sweeping Slash deals 25% more damage. | |
| Deadly Reprisal | Taking non-periodic area of effect damage generates 2 rage. This effect cannot occur more than once per second. | |
| Unyielding | You generate 4 rage when stunned, immobilized, put to sleep, or knocked around. | |
| Masterful | ||
| Pooled Hatred | Whenever your movement is impaired, you gain a 10% damage bonus to your next ability that consumes rage. This effect can stack up to 5 times and lasts 15 seconds. | |
| Crushing Fist | For the Immortal discipline, Smash slows the targets it damages by 60% for 10 seconds. For the Vengeance and Rage disciplines, Smash and Vengeful Slam sunder the targets they damage for 45 seconds. Sundered targets have their armor rating decreased by 20%. | |
| Sonic Wall | Threatening Scream protects all allies within range, excluding yourself, granting Sonic Wall, which absorbs a moderate amount of damage. Lasts 10 seconds. | |
| Strangulate | Reduces the cooldown of Force Choke by 15 seconds. | |
| Unstoppable | Force Charge grants Unstoppable, granting immunity to movement-impairing effects and effects that push or pull you around for 4 seconds. | |
| Unshackling Rage | Activating Enrage purges movement-impairing effects and increases your movement speed by 50% for 6 seconds. | |
| Heroic | ||
| War Bringer | Force Charge enables your next Vicious Throw or Hew to be used against a target with any percentage of health. Lasts up to 15 seconds. | |
| Through Passion | Reduces the cooldown of Enraged Defense by 30 seconds. | |
| Seething Hatred | When you exit combat, the active cooldowns of Force Charge, Enrage, and Saber Throw are reduced by 100%. | |
| Hardened Defense | For Vengeance and Rage, all area effect damage is reduced by 60% for 15 seconds after Threatening Scream is activated. For Immortal, all damage is reduced by 30% while stunned. | |
| Through Power | Enraged Defense increases your movement speed by 50% and grants immunity to movement-impairing effects while active. | |
| Consuming Rage | Endure Pain removes all cleansable effects when activated. | |
| Legendary | ||
| Through Victory | Mad Dash can be used while immobilized, purges movement-imparing effects when activated, and deals 50% more damage. Additionally, the cooldown of Mad Dash is reduced by 10 seconds. | |
| Piercing Chill | Chilling Scream pierces enemies with an aching chill, dealing 𝑥 elemental damage to all affected targets over 8 seconds. Additionally, Chilling Scream grants Chilling Speed, increasing your movement speed by 35% for 8 seconds. | |
| Thrown Gauntlet | Reduces the cooldowns of Force Push and Intimidating Roar by 15 seconds. Additionally, Saber Throw immobilizes the target for 3 seconds. | |
| Extending Roar | Increases the range of Force Scream to 30 meters, but Force Scream deals reduced damage beyond 10 meters. Additionally, Force Push deals 20% more damage and grants Extending Roar, allowing your next Force Scream to deal full damage regardless of the distance from the target. | |
| Intimidating Presence | Force Charge finishes the cooldown on Disruption. In addition, Saber Reflect lasts 2 seconds longer, and if Soresu Form is being utilized, generates a high amount of threat on all engaged enemies within 30 meters when activated. | |
| Reckoning | Intercede grants Reckoning, increasing the damage dealt by your next melee ability by 20%. This effect lasts for 10 seconds. Additionally, reduces the cooldown of Intercede by 5 seconds and reduces the threat and damage taken by an additional 10% each for the friendly target of Intercede. | |
Defense Guardian
Offensive Abilities
The priority system is as follows:
- Riposte,
- Guardian Slash,
- Blade Barrage (if target is in execute range, Dispatch is also here),
- Blade Storm then
- Force Sweep.
| Ability | Notes |
|---|---|
| Slash | Single-target filler; also applies Trauma, reducing targets’ healing received by 20%. |
| Cyclone Slash | AoE filler; also applies Trauma, reducing targets’ healing received by 20%. |
| Warding Strike | Generates 6 rage and increases damage reduction by 3% for 20 seconds; when active, Guardian Slash hits up to 7 additional targets. |
| Saber Throw | Deals single-target damage at range and builds 3 focus. |
| Freezing Force | Spammable AoE slow; Persistent Chill utility causes Freezing Force to deal periodic elemental damage to targets and increases caster’s movement speed for 8 seconds. |
| Strike | Use when out of focus. |
| Courage | Passive skill. Parrying, deflecting, shielding against or resisting an attack has a 50% chance to grant Courage, reducing the rage consumed by your next Blade Storm or Dispatch by 1. |
Defensive/Peeling Tools
| Ability | Notes |
|---|---|
| Guardian Leap | A friendly leap exclusive to Guardians. The player who is leapt to benefits from 20% damage reduction for 6 seconds. This is powerful, especially in conjunction with taunts and/or Guard. |
| Force Push | Can be used offensively (to interrupt and isolate targets) and defensively (to help peel). |
Fig. 6: Guardian’s Guardian Leap animation.
Defensive Cooldowns
| Ability | Notes |
|---|---|
| Saber Reflect | This is one of your go-to cooldowns when under heavy focus fire or being “tank tunneled”. It should only be used in this situation as it does nothing to mitigate collateral AoE damage or damage taken through Guard. You need to learn which attacks can be reflected and notice when you are the main target of these attacks. |
| Focused Defense | While it can be used at <70% health, never use it at more than 50% health or you risk wasting it by overhealing yourself. You should be particularly conservative with this DCD when you have a healer on your team. Unless you’re in voice chat with your healer to ask them, you can’t know for sure whether you need to use Focused Defense or to expect some burst healing. If you are in communication with your healer, let them know before you use it so they can focus on healing others and avoid overhealing you. Note that this ability can be used while stunned. |
| Warding Call | Reduces damage taken from all sources by 40% for 10 seconds (or 15 seconds with the War Leader 6-piece set bonus). That includes collateral AoE damage and damage taken through Guard. Note that the damage reduction is multiplicative, not additive. Use it to stay ahead during periods of heavy incoming damage. |
| Saber Ward | This is ideally used when tank tunneled because it grants 100% dodge chance for its first 5 seconds with Blade Turning and the War Leader 6-piece set bonus and 50% increased dodge chance for the remainder. This is useless against a lot of the AoE you’re likely to catch. However, unlike Deflection (Deflection), this ability also offers +25% damage reduction against Force and tech attacks. It can therefore be effective (to a varying degree) at mitigating damage taken through Guard but is still much less effective than at mitigating direct damage. If your opponents show no interest in tank tunneling you then you need to be prepared to use it just for the yellow damage reduction. Note that, because you can’t dodge attacks while hard stunned, this cooldown is especially effective when you have full resolve (are “white-barred”). |
| Enure | This is an odd DCD. For the Defense discipline, it temporarily increases maximum health by 30% for 20 seconds. However, the extra (or “fake”) health is lost when Enure expires. When out of options, it buys time for teammates to heal you or for other DCDs to come off cooldown. |
| Blade Blitz | Grants a brief window of immunity to everything (damage and CCs). Use it to kite, establish range, reposition or to resist abilities like Heatseeker Missiles (Demolition Round) or Thermal Detonator (Assault Plastique) |
Recommended Utilities
| Key | |
|---|---|
| must have | |
| recommended | |
| not recommended | |
The following table ranks utilities by usefulness (see key). A recommended build for typical warzones is given afterwards. When you feel comfortable with the discipline, I encourage you to experiment, to find which utilities complement your playstyle and which are best suited to particular situations, team compositions, etc.
| Utility | Description | Appraisal |
|---|---|---|
| Second Wind | Reduces the cooldown of Resolute by 30 seconds and causes Resolute to heal you for 10% of your maximum health when used. | |
| Battlefield Command | Getting attacked reduces the active cooldown of Force Leap by 1 second. This effect cannot occur more than once every 1.5 seconds. | |
| Debilitation | Blade Barrage immobilizes the target for 3 seconds. | |
| Trailblazer | Cyclone Slash deals 25% more damage. | |
| Narrowed Focus | Taking non-periodic area of effect damage generates 2 focus. This effect cannot occur more than once per second. | |
| Defiance | You generate 4 focus when stunned, immobilized, put to sleep, or knocked around. | |
| Masterful | ||
| Gather Strength | Whenever your movement is impaired, you gain a 10% damage bonus to your next ability that consumes focus. This effect can stack up to 5 times and lasts 15 seconds. | |
| Purifying Sweep | For the Defense discipline, Force Sweep slows the targets it damages by 60% for 10 seconds. For the Vigilance and Focus disciplines, Force Sweep and Vigilant Thrust sunder the targets they damage for 45 seconds. Sundered targets have their armor rating decreased by 20%. | |
| Guardianship | Challenging Call protects all allies within range, excluding yourself, granting Guardianship, which absorbs a moderate amount of damage. Lasts 10 seconds. | |
| Pulse | Reduces the cooldown of Force Stasis by 15 seconds. | |
| Unremitting | Force Leap grants Unremitting, granting immunity to movement-impairing effects and effects that push or pull you around for 4 seconds. | |
| Focused Freedom | Activating Combat Focus purges movement-impairing effects and increases your movement speed by 50% for 6 seconds. | |
| Heroic | ||
| Ardent Advocate | Force Leap enables your next Dispatch or Whirling Blade to be used against a target with any percentage of health. Lasts up to 15 seconds. | |
| Through Peace | Reduces the cooldown of Focused Defense by 30 seconds. | |
| Preparation | When you exit combat, the active cooldowns of Force Leap, Combat Focus, and Saber Throw are reduced by 100%. | |
| Stalwart Defense | For Vigilance and Focus, all area effect damage is reduced by 60% for 15 seconds after Challenging Call is activated. For Defense, all damage is reduced by 30% while stunned. | |
| True Harmony | Focused Defense increases your movement speed by 50% and grants immunity to movement-impairing effects while active. | |
| Peaceful Focus | Enure removes all cleansable effects when activated. | |
| Legendary | ||
| Cut Loose | Blade Blitz can be used while immobilized, purges movement-imparing effects when activated, and deals 50% more damage. Additionally, the cooldown of Blade Blitz is reduced by 10 seconds. | |
| Persistent Chill | Freezing Force pierces enemies with an aching chill, dealing 𝑥 elemental damage to all affected targets over 8 seconds. Additionally, Freezing Force grants Chilling Speed, increasing your movement speed by 35% for 8 seconds. | |
| Jedi Warden | Reduces the cooldowns of Force Push and Awe by 15 seconds. Additionally, Saber Throw immobilizes the target for 3 seconds. | |
| Unyielding Justice | Increases the range of Blade Storm to 30 meters, but Blade Storm deals reduced damage beyond 10 meters. Additionally, Force Push deals 20% more damage and grants Unyielding Justice, allowing your next Blade Storm to deal full damage regardless of the distance from the target. | |
| Daunting Presence | Force Leap finishes the cooldown on Force Kick. In addition, Saber Reflect lasts 2 seconds longer, and if Soresu Form is being utilized, generates a high amount of threat on all engaged enemies within 30 meters when activated. | |
| Thwart | Guardian Leap grants Thwart, increasing the damage dealt by your next melee ability by 20%. This effect lasts for 10 seconds. Additionally, reduces the cooldown of Guardian Leap by 5 seconds and reduces the threat and damage taken by an additional 10% each for the friendly target of Guardian Leap. | |
Darkness Assassin
Offensive Abilities
The opening rotation is as follows:
- Wither,
- Shock,
- Thrash (filler),
- autocrit Shock,
- Depredating Volts (only with three stacks of Harnessed Darkness) then
- Maul (when proc’d).
From there, the priority system is as follows:
- Assassinate (only usable when the target is in execute range),
- Depredating Volts (when proc’d),
- Wither or Shock then
- Maul (when proc’d).
| Ability | Notes |
|---|---|
| Thrash | Filler when waiting for Wither or Shock to come back up and Maul isn’t proc’d. Thrash also applies Trauma, reducing targets’ healing received by 20%. |
| Harnessed Darkness | Passive skill. Wither and Shock proc Harnessed Darkness (stacks up to three times), which makes Depredating Volts uninterruptible and immune to pushback. Additionally, each stack increases the damage of the next Depredating Volts by 15%. |
| Assassinate | Use on cooldown if a target is in execute range. |
| Discharge | When proc’d (by shielding against, parrying and deflecting attacks), use this for maximum cleave. |
| Lacerate | Only use when you see a good cleave opportunity; it applies the Trauma debuff (20% decreased healing received) and procs Maul (via Conspirator’s Cloak ) and Shock (via Energize). |
| Saber Strike | Use when out of Force. |
| Recklessness | Increases the critical chance of direct Force attacks by 60%. Good combos include
|
Defensive/Peeling Tools
| Ability | Notes |
|---|---|
| Defection | Mounting Darkness is a Darkness passive which turns Deflection into an 8-meter AoE aura centered on the caster. Enemies within its radius deal 15% less Force and tech damage for 12 seconds (or 15 seconds with the Survivor 6-piece set bonus, which also reduces its cooldown by 10 seconds). |
| Phantom Stride | Instantly teleport to an enemy target. Can be used to get back into Guard range or CC an incoming enemy. Does not break stealth. |
| Force Pull | Can be used to peel for an ally or move an enemy out of position for a kill. |
| Overload | Conal AoE knockback. The Electric Bindings utility causes targets to be rooted. |
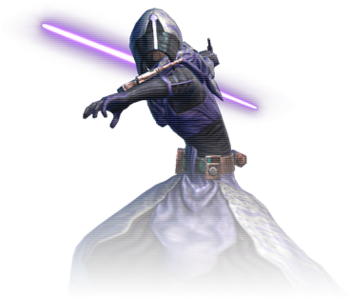
Fig. 7: Assassin’s Deflection/Mounting Darkness animation.
Defensive Cooldowns
| Ability | Notes | |
|---|---|---|
| Force Speed | The Phasing Phantasm utility causes Force Speed to grant 60% damage reduction for its duration. Use to mitigate burst damage directed at you or your guarded target. Use on cooldown when under heavy fire. | |
| Recklessness | As well as being a potent offensive cooldown, Recklessness additionally grants 30% Shield Absorption for 20 seconds (via the Shroud of Darkness passive). | |
| Force Shroud | Use to purge debuffs, resist big yellow damage and resist stuns. Because of its short, one-minute cooldown (further reduced by shielding/parrying/deflecting attacks via the Lightning Recovery passive), you can use Force Shroud liberally. | |
| Overcharge Saber | Use when you need longer-lasting damage reduction (+25% for the duration via the Premonition passive). Make sure not to pop it too early as it heals you for 15% of your maximum HP on activation. Because it provides flat damage reduction (from all sources), it is particularly useful for mitigating damage taken though Guard. | |
| Deflection | Deflection increases your chance to parry melee and ranged attacks by 50% for 12 seconds. Because you can parry melee/ranged attacks against your guarded target, it’s useful when you or your guarded target are taking heavy white damage (e.g., from Marksmanship Snipers). If you or your guarded target are taking heavy yellow damage, use Overcharge Saber instead. The debuff (from Mounting Darkness) applied to enemies within 15m mitigates single-target yellow damage directed at any of your teammates (not just you and your guarded ally). However, 15% damage reduction is fairly small. Ideally, you will use Deflection when you or your guarded target are under focus fire and you’re in a position to debuff multiple enemies—but you will sometimes be forced to use it for one situation or the other. Note that, because you can’t dodge attacks while hard stunned, this cooldown is especially effective when you have full resolve (are “white-barred”). | |
| Force Cloak | This has three main uses. Firstly, when you need to disengage from a fight. Secondly, when you need to temporarily reduce pressure on yourself and give your healers breathing room. Note that, in both instances, you first need to deactivate Guard to prevent getting decloaked by Guard damage or (somewhat less importantly) getting stuck in combat. Thirdly, you can also use it at as a second, shorter Force Shroud. However, you should only do this if you are confident you won’t need the cooldown as an escape (as in the first two examples) anytime soon. Force Cloak also “resets” your Warzone Medpac, which has a cooldown of 1.5 minutes but also requires you to break combat to use it again. In theory, Assassins can use their medpac every 1.5 minutes with Force Cloak. |
Recommended Utilities
| Key | |
|---|---|
| must have | |
| recommended | |
| not recommended | |
The following table ranks utilities by usefulness (see key). A recommended build for typical warzones is given afterwards. When you feel comfortable with the discipline, I encourage you to experiment, to find which utilities complement your playstyle and which are best suited to particular situations, team compositions, etc.
| Utility | Description | Appraisal |
|---|---|---|
| Avoidance | Reduces the cooldown of Jolt by 2 seconds, Unbreakable Will by 30 seconds, and Force Speed by 5 seconds. | |
| Oppressing Force | Lowers the cooldown of Electrocute by 15 seconds and increases the duration of Force Slow and reduces its cooldown by 6 seconds. In addition, your Whirlwind affects up to 2 additional standard or weak enemies within 8 meters of the target. | |
| Formless Phantom | As Darkness, reduces all damage taken while stunned by 30%. As Deception and Hatred, reduces the damage taken from area attacks by 30%. | |
| Lambaste | Increases the damage dealt by Lacerate by 25%. | |
| Electric Bindings | Overload binds its targets in electricity, immobilizing them for 5 seconds. Direct damage dealt after 2 seconds ends the effect prematurely. | |
| Snaring Slashes | Thrash, Voltaic Slash, and Lacerate reduce the movement speed of the targets they damage by 30% for 6 seconds. | |
| Masterful | ||
| Fade | Reduces the cooldown of Force Cloak by 45 seconds and extends its duration by 5 seconds. | |
| Obfuscation | Increases your movement speed by 15% and your effective stealth level by 10 | |
| Nerve Wracking | Targets controlled by your Spike or Electrocute take 5% more damage from all sources. | |
Assassin’s Shelter |
Mass Mind Control provides Assassin’s Shelter to all allies within range, excluding yourself, reducing the damage they take by 5% for the next 6 seconds and healing them for 𝑥 health over the duration. | |
| Audacity | Reduces the cooldown of Overload by 2.5 seconds and Recklessness grants 1 additional charge when activated. | |
| Speed Surge | Activating Shock, Ball Lightning, or Eradicate increases your movement speed by 50% for 9 seconds. This effect cannot occur more than once every 18 seconds. | |
| Heroic | ||
| Magnetism | When a target recovers from being stunned by your Spike or Electrocute, its movement speed is slowed by 90% for the following 3 seconds. Additionally, Force Cloak increases your movement speed by 50% while it is active, and Force Slow reduced the movement speed of its target by an additional 20%. | |
| Shroud of Madness | Activating Force Cloak grants 2 seconds of Force Shroud. | |
| Dark Stability | Activating Deflection grants 6 seconds of immunity to stun, sleep, lift, and incapaciting effects. | |
| Insulation | When damage breaks your Mind Trap prematurely, the target will suffer from Sapped Mind, reducing the damage they deal by 25% for 10 seconds. Additionally, you gain another benefit depending on your active discipline. Darkness: Depredating Volts increases movement speed by 35% for 6 seconds. Deception, Hatred: Increases your armor rating by 30%, | |
| Emersion | Force Speed grants Emersion, removing all movement-impairing effects and granting immunity to them for the duration. | |
| Haunted Dreams | If your Whirlwind breaks early from damage, the target is stunned for 2 seconds. In addition, Whirlwind activates instantly. | |
| Legendary | ||
| Disjunction | Increases the durations of Force Shroud by 2 seconds and Force Speed by 0.5 seconds. Additionally, Force Speed slows all enemies within 5 meters by 75% for 2.5 seconds when activated. | |
Reaper’s Rush |
Phantom Stride grants Reaper’s Rush, allowing your next Assassinate to be used on any target, regardless of remaining health. Reaper’s Rush lasts for 10 seconds. Additionally, if the target of your Phantom Stride is killed within 10 seconds of using Phantom Stride, Phantom Stride’s cooldown is reset. |
|
| Hand of Darkness | Force Pull immobilizes its target for 3 seconds. Leeching Strike immobilizes its target for 2 seconds, and Low Slash immobilizes its target for 1 second after the incapacitating effect wears off. In addition, successful use of Mind Trap grants Hand of Darkness, increasing the critical chance of your next direct attack by 100%. This effect lasts for 20 seconds. | |
| Renewing Darkness | When entering stealth with Force Cloak you generate a stack of Renewing Darkness and heal 4% of your maximum health every 2 seconds for 10 seconds. Stacks last for 6 seconds. When stealth is broken, each stack of Renewing Darkness heals you for 4% of your health. | |
| Phasing Phantasm | Phantom Stride can be used while immobilized and purges movement-impairing effects when used. Additionally, Force Speed grants Phasing Phantasm, causing you to absorb 60% of all incoming damage for the duration of Force Speed. | |
| Retaliatory Grip | Deflection grants Retaliatory Grip, reflecting 50% (or 100% for the Darkness discipline) of all direct single target tech and Force damage back at the attacker. Retaliatory Grip lasts for 12 seconds and does not absorb incoming damage. | |
Kinetic Combat Shadow
Offensive Abilities
The opening rotation is as follows:
- Slow Time,
- Project,
- Double Strike (filler),
- autocrit Project,
- Cascading Debris (only with 3 stacks of Harnessed Darkness) then
- Shadow Strike (when proc’d).
From there, the priority system is as follows:
- Spinning Strike,
- Cascading Debris,
- Slow Time or Project then
- Shadow Strike (when proc’d).
Double Strike for filler when waiting for Slow Time or Project to come back up and Shadow Strike isn’t proc’d. Double Strike also applies Trauma, reducing targets’ healing received by 20%.
Slow Time and Project proc Harnessed Shadows (stacks up to 3 times), which makes Cascading Debris uninterruptible and immune to pushback. Additionally, each stack increases the damage of the next Cascading Debris by 15%.
Do not use Cascading Debris, Force Breach or Shadow Strike unless proc’d.
Spinning Strike on cooldown if a target is in execute range.
When proc’d (by shielding against, parrying and deflecting attacks), use Force Breach for maximum cleave.
Only Whirling Blow when you see a good cleave opportunity; it applies the Trauma debuff (20% decreased healing received) and procs Shadow Strike/Project.
Out of Force? Saber Strike.
Force Potency increases critical chance of direct Force attacks by 60%. Good combos include
- Force Potency → autocrit Project → Cascading Debris and
- Force Potency → Cascading Debris → Slow Time (AoE).
Defensive/Peeling Tools
Deflection: Pulsating Force is a Kinetic Combat passive which turns Deflection into an 8-meter AoE aura centered on the caster. Enemies within its radius deal 15% less Force and tech damage for 12 seconds (or 15 seconds with the Survivor 6-piece set bonus, which also reduces its cooldown by 10 seconds).
Fig. 8: Shadow’s Deflection/Pulsating Force animation (credit: Valek).
Shadow Stride: Instantly teleport to an enemy target. Can be used to get back into Guard range or CC an incoming enemy. Does not break stealth.
Force Pull can be used to peel for an ally or move an enemy out of position for a kill.
Defensive Cooldowns
Force Speed: The One with the Shadows utility causes Force Speed to grant 60% damage reduction for its duration. Use to mitigate burst damage directed at you or your guarded target. Use on cooldown when under heavy fire.
Force Potency: As well as being a powerful offensive cooldown, Force Potency additionally grants 30% shield absorption for 20 seconds (via the Mental Fortitude passive).
Resilience: Use to purge debuffs, resist big yellow damage and resist stuns. Because of its short, 1-minute cooldown (further reduced by shielding/parrying/deflecting attacks via the Rapid Recovery passive), you can use Resilience liberally.
Battle Readiness: Use when you need longer-lasting damage reduction (+25% for the duration via the Shadowsight passive). Make sure not to pop it too early as it also heals you for 15% of your maximum HP on activation. Because it provides flat damage reduction (from all sources), it is particularly useful for mitigating damage taken though Guard.
Deflection: Deflection increases your chance to parry melee and ranged attacks by 50% for 12 seconds. Because you can parry melee/ranged attacks against your guarded target, it’s useful when you or your guarded target are taking heavy white damage (e.g., from Marksmanship Snipers).
If you or your guarded target are taking heavy yellow damage, use Battle Readiness instead.
The debuff (from Pulsating Force) applied to enemies within 15m mitigates single-target yellow damage directed at any of your teammates (not just you and your guarded ally). However, 15% damage reduction is fairly small. Ideally, you will use Deflection when you or your guarded target are under focus fire and you’re in a position to debuff multiple enemies—but you will sometimes be forced to use it for one situation or the other. Note that, because you can’t dodge attacks while hard stunned, this cooldown is especially effective when you have full resolve (are “white-barred”).
Force Cloak: Force Cloak has three main uses. Firstly, when you need to disengage from a fight. Secondly, when you need to temporarily reduce pressure on yourself and give your healers breathing room. Note that, in both instances, you first need to deactivate Guard to prevent getting decloaked by Guard damage or (somewhat less importantly) getting stuck in combat. Thirdly, you can also use it at as a second, shorter Resilience. However, you should only do this if you are confident you won't need the cooldown as an escape (as in the first two examples) anytime soon. Force Cloak also “resets” your Warzone Medpac, which has a cooldown of 1.5 minutes but also requires you to break combat to use it again. In theory, Shadows can use their medpac every 1.5 minutes with Force Cloak.
Recommended Utilities
| Key | |
|---|---|
| must have | |
| recommended | |
| not recommended | |
The following table ranks utilities by usefulness (see key). A recommended build for typical warzones is given afterwards. When you feel comfortable with the discipline, I encourage you to experiment, to find which utilities complement your playstyle and which are best suited to particular situations, team compositions, etc.
| Utility | Description | Appraisal |
|---|---|---|
| Celerity | Reduces the cooldown of Mind Snap by 2 seconds, Force of Will by 30 seconds, and Force Speed by 5 seconds. | |
| Pinning Resolve | Reduces the cooldown of Force Stun by 15 seconds and increases the duration of Force Slow and reduces its cooldown by 6 seconds. In addition, your Force Lift affects up to 2 additional standard or weak enemies within 8 meters of the target. | |
| Intangible Spirit | As Kinetic Combat, reduces all damage taken while stunned by 30%. As Infiltration and Serenity, reduces the damage taken from area attacks by 30%. | |
| Lambaste | Increases the damage dealt by Whirling Blow by 25%. | |
| Force Wake | Force Wave unbalances its targets, immobilizing them for 5 seconds. Direct damage dealt after 2 seconds ends the effect prematurely. | |
| Snaring Strikes | Double Strike, Clairvoyant Strike, and Whirling Blow reduce the movement speed of the targets they damage by 30% for 6 seconds. | |
| Masterful | ||
| Fade | Reduces the cooldown of Force Cloak by 45 seconds and extends its duration by 5 seconds. | |
| Misdirection | Increases your movement speed by 15% and your effective stealth level by 10 | |
| Nerve Wracking | Targets controlled by your Spinning Kick or Force Stun take 5% more damage from all sources. | |
Shadow’s Shelter |
Mass Mind Control provides Shadow’s Shelter to all allies within range, excluding yourself, reducing the damage they take by 5% for the next 6 seconds and healing them for 𝑥 health over the duration. | |
| Force Harmonics | Reduces the cooldown of Force Wave by 2.5 seconds and Force Potency grants 1 additional charge when activated. | |
| Kinetic Acceleration | Activating Project, Psychokinetic Blast, or Squelch increases your movement speed by 50% for 9 seconds. This effect cannot occur more than once every 18 seconds. | |
| Heroic | ||
| Motion Control | When a target recovers from being stunned by your Spinning Kick or Force Stun, its movement speed is slowed by 90% for the following 3 seconds. Additionally, Force Cloak increases your movement speed by 50% while it is active, and Force Slow reduced the movement speed of its target by an additional 20%. | |
| Cloak of Resilience | Activating Force Cloak grants 2 seconds of Resilience. | |
| Sturdiness | Activating Deflection grants 6 seconds of immunity to stun, sleep, lift, and incapaciting effects. | |
| Shadowy Veil | When damage breaks your Mind Maze prematurely, the target will suffer from Sapped Mind, reducing the damage they deal by 25% for 10 seconds. Additionally, you gain another benefit depending on your active discipline. Kinetic Combat: Cascading Debris increases movement speed by 35% for 6 seconds. Infiltration, Serenity: Increases your armor rating by 30%, | |
| Egress | Force Speed grants Egress, removing all movement-impairing effects and granting immunity to them for the duration. | |
| Containment | If your Force Lift breaks early from damage, the target is stunned for 2 seconds. In addition, Force Lift activates instantly. | |
| Legendary | ||
| Mind over Matter | Increases the durations of Resilience by 2 seconds and Force Speed by 0.5 seconds. Additionally, Force Speed slows all enemies within 5 meters by 75% for 2.5 seconds when activated. | |
Stalker’s Swiftness |
Shadow Stride grants Stalker’s Swiftness, allowing your next Spinning Strike to be used on any target, regardless of remaining health. Stalker’s Swiftness lasts for 10 seconds. Additionally, if the target of your Shadow Stride is killed within 10 seconds of using Shadow Stride, Shadow Stride’s cooldown is reset. |
|
| Martial Prowess | Force Pull immobilizes its target for 3 seconds, Serenity Strike immobilizes its target for 2 seconds, and Low Slash immobilizes its target for 1 second after the incapacitating effect wears off. In addition, successful use of Mind Maze grants Martial Prowess, increasing the critical chance of your next direct attack by 100%. This effect lasts for 20 seconds. | |
| Restorative Shade | When entering stealth with Force Cloak you generate a stack of Restorative Shade and heal 4% of your maximum health every 2 seconds for 10 seconds. Stacks last for 6 seconds. When stealth is broken, each stack of Restorative Shade heals you for 4% of your health. | |
| One with the Shadows | Shadow Stride can be used while immobilized and purges movement-impairing effects when used. Additionally, Force Speed grants One with the Shadows, causing you to absorb 60% of all incoming damage for the duration of Force Speed. | |
| Avenging Grip | Deflection grants Avenging Grip, reflecting 50% (or 100% for the Kinetic Combat discipline) of all direct single target tech and Force damage back at the attacker. Avenging Grip lasts for 12 seconds and does not absorb incoming damage. | |
Shield Tech Powertech
Offensive Abilities
The priority system is as follows:
- Heat Blast whenever proc’d (by shielding against an attack or triggering Ion Gas Cylinder),
- Rocket Punch,
- Rail Shot then
- Firestorm (floats in priority as it’s on internal cooldown—wait for ideal cleave).
Flame Sweep: Spammable AoE ability. Applies Trauma debuff (20% less healing received). The Suppressive Tools utility additionally causes Flame Sweep to slow affected targets.
Flame Burst: Good single-target damage. Applies Trauma debuff (20% less healing received).
Explosive Fuel: Offensive and defensive cooldown, increasing ranged and tech critical hit chance by 25% and defense chance by 35% (via Coolant passive).
Shatter Slug: Shouldn’t be used unless without the Mutilating Shards utility (slows affected targets by 75% for 15 seconds). Flame Sweep/Suppressive Tools slow is arguably superior.
Deadly Onslaught: Only use if you see a good cleave opportunity.
Shoulder Cannon: Use on cooldown. Can also be used while CC’d.
Overheated? Use Vent Heat and/or Rapid Shots.
Defensive/Peeling Tools
Oil Slick is unique to Shield Tech. It reduces the movement speed of all targets within its AoE by 70% and reduces their accuracy by 15%. It lasts 10 seconds (or 13 seconds with the Supercommando 6-piece set bonus) and is hard to miss, leaving a giant pool of oil at its location. It’s particularly effective against melee attackers, who have a hard time escaping it. You can either stand in the AoE or just outside it, forcing melee to trudge through or take the long way around.
Fig. 9: Powertech’s Oil Slick animation.
Translocate is a cast ability that causes you and a friendly target to swap locations. Translocated allies cannot be leapt to or pulled and are immune to interrupts and pushback for 6 seconds or until they use an aggressive/healing ability. Translocate can be used to quickly get an ally out of a bad position and put you back on the frontline. Does not interrupt targeted ally’s casts.
Fig. 10: Powertech’s Translocate animation.
Grapple can be used to peel for an ally or move an enemy out of position for a kill.
Defensive Cooldowns
Explosive Fuel: Explosive Fuel is Shield Tech’s go-to defensive cooldown because it doubles as a powerful offensive cooldown (+25% critical hit chance). +35% defense chance not only results in significant damage mitigation (theoretically more than Energy Shield’s +25% damage reduction) but can also resist hard stuns, CCs, slows and other nastiness to boot.
Energy Shield: Increases damage reduction by 25% for 15 seconds (or 19 seconds with the Supercommando 6-piece set bonus). Note that this increase is additive, not multiplicative. Use when Explosive Fuel is not available or would be overkill.
Kolto Overload: Using Kolto Overload effectively is about judging how low you can safely let your health drop before popping it to maximize its value. Too early and it’s useless to you and your healers; too late and you can easily die through it. If you are being tank tunneled by multiple enemies, err on the side of caution and use it early. If you are getting slowly worn down by Guard damage and/or collateral AoE damage, you can afford to let your health drop more—though observant enemies may take note of your dropping health and swap to you.
Hydraulic Overrides: Breaks roots, increases movement speed and grants immunity to movement-controlling effects for the duration. A versatile ability, Hydraulic Overrides enables you to kite, chase down enemies and get back into Guard range.
Recommended Utilities
To the left are utilities ranked by usefulness (key below). To the right is a recommended build for typical warzones. When you feel comfortable with the discipline, I encourage you to experiment, to find which utilities complement your playstyle and which are best suited to particular situations, team compositions, etc.
| Key | |
|---|---|
| green outline | must have |
| red cross | not recommended |
| unmodified | situational |
Shield Specialist Vanguard
Offensive Abilities
The priority system is as follows:
- Energy Blast whenever proc’d (by shielding against an attack or triggering Ion Cell),
- Stockstrike,
- High Impact Bolt then
- Ion Storm (floats in priority as it’s on internal cooldown—wait for ideal cleave).
Explosive Surge: Spammable AoE ability. Applies Trauma debuff (20% less healing received). The Entangling Tools utility additionally causes Explosive Surge to slow affected targets.
Ion Pulse: Good single-target damage. Applies Trauma debuff (20% less healing received).
Battle Focus: Offensive and defensive cooldown, increasing ranged and tech critical hit chance by 25% and defense chance by 35% (via Soldier's Grit passive).
Flak Shell: Shouldn’t be used unless without the Smothering Slag utility (slows affected targets by 75% for 15 seconds). Explosive Surge/Entangling Tools slow is arguably superior.
Artillery Blitz: Only use if you see a good cleave opportunity.
Shoulder Cannon: Use on cooldown. Can also be used while CC’d.
Out of ammo? Use Recharge Cells and/or Hammer Shot.
Defensive/Peeling Tools
Riot Gas is unique to Shield Specialist. It reduces the movement speed of all targets within its AoE by 70% and reduces their accuracy by 15%. It lasts 10 seconds (or 13 seconds with the Supercommando 6-piece set bonus) and is hard to miss, releasing a canister of red gas at its location. It’s particularly effective against melee attackers, who have a hard time escaping it. You can either stand in the AoE or just outside it, forcing melee to trudge through or take the long way around.
Fig. 11: Vanguard’s Riot Gas animation.
Transpose is a cast ability that causes you and a friendly target to swap locations. Transposed allies cannot be leapt to or pulled and are immune to interrupts and pushback for 6 seconds or until they use an aggressive/healing ability. Transpose can be used to quickly get an ally out of a bad position and put you back on the frontline. Does not interrupt targeted ally’s casts.
Harpoon can be used to peel for an ally or move an enemy out of position for a kill.
Defensive Cooldowns
Battle Focus: Battle Focus is the Shield Specialist’s go-to defensive cooldown because it doubles as a powerful offensive cooldown (+25% critical hit chance). +35% defense chance not only results in significant damage mitigation (theoretically more than Reactive Shield’s +25% damage reduction) but can also resist hard stuns, CCs, slows and other nastiness to boot.
Reactive Shield: Increases damage reduction by 25% for 15 seconds (or 19 seconds with the Supercommando 6-piece set bonus). Note that this increase is additive, not multiplicative. Use when Battle Focus is not available or would be overkill.
Adrenaline Rush: Using Adrenaline Rush effectively is about judging how low you can safely let your health drop before popping it to maximize its value. Too early and it’s useless to you and your healers; too late and you can easily die through it. If you are being tank tunneled by multiple enemies, err on the side of caution and use it early. If you are getting slowly worn down by Guard damage and/or collateral AoE damage, you can afford to let your health drop more—though observant enemies may take note of your dropping health and swap to you.
Hold the Line: Breaks roots, increases movement speed and grants immunity to movement-controlling effects for the duration. A versatile ability, Hold the Line enables you to kite, chase down enemies and get back into Guard range.
Recommended Utilities
To the left are utilities ranked by usefulness (key below). To the right is a recommended build for typical warzones. When you feel comfortable with the discipline, I encourage you to experiment, to find which utilities complement your playstyle and which are best suited to particular situations, team compositions, etc.
| Key | |
|---|---|
| green outline | must have |
| red cross | not recommended |
| unmodified | situational |
Conclusion
Tanking is about balance: maximizing your damage output while mitigating as much incoming damage as possible. By Guard swapping; using taunts on CD; understanding the particulars of the resolve system and how to CC effectively; performing the correct rotation; understanding how to best peel for allies; using your DCDs correctly and making sound utility choices, you’re on your way to becoming a valuable member of your team.
The skill ceiling is almost limitless: there are always ways to improve. Always aim to advance your game knowledge. Learn to identify dangerous situations and abilities so you can get the most value out of Guard. You need to know who to Guard and when (e.g., an ally who is about to be Ambushed) and when to disable Guard to prevent yourself dying unnecessarily. Developing this level of game sense takes time, effort and a lot of practice. I hope this guide opens your eyes to the complexities of PvP tanking and helps you take your gameplay to the next level.
Acknowledgements
Big thanks to Puddlejumper for his insights and to doc for his major contributions to this article.
Thanks also to the teams at TORCommunity and Jedipedia, whose databases were invaluable references in writing this guide.
Thanks also to rambol for revising and copyediting the text and for enabling me to share my insights with the community by hosting the guide.
Finally, a special shoutout to that one guy in that arena who couldn’t Guard swap. This guide is dedicated to you.
About the Author
I’m known as Hottie on Satele Shan. I have written four comprehensive guides to Operative healing and am a regular contributor here at rambol.net. I am passionate about gaming, PvP and Operative healing in particular. I have thousands of warzones under my belt, as well as hundreds of hours of team and solo ranked. I love to stream my gameplay and give tips to aspiring players. I am also passionate about giving back to the community and run my own SWTOR charity events. With the help of my guildies, friends and the SWTOR community, we have managed to raise thousands of dollars for several charities, including the American Cancer Society and the American Foundation for Suicide Prevention.
You can contact me via this form, on Twitch or Twitter or leave a comment below.

